Hi, I'm award winning photographer and educator Noel Chenier Check out my new learning community at http://www.learnphoto365.com! This is an old blog archive of posts. Try out my Photography Assignment Generator Apps on the App Store! www.learnphoto.ca/apps. Any questions, contact me at noel@noelchenier.ca
Wednesday, October 3, 2012
Thursday, September 6, 2012
Get Great Shots At The Harvest Jazz And Blues Festival
Friday, August 10, 2012
Annual Perseids Meteor Shower This Weekend!
The
annual Perseids Meteor Showers is happening this weekend! So get out
your tripods, get a cup of Tim's, and go shoot them! Here's some tips
on how!
Pre-Shooting Preparation:
Charge your batteries fully before going out. It might be a bit colder at night, and that can affect battery life. Wear some warm clothes, a hat, and gloves. Bring some hot beverages, some friends, and make it a fun outing! At least you'll have someone to talk to between exposures.
Also bring a flashlight or LED keychain light so you can see what you are doing when changing your settings. A headlight looks dorky, but it let's you works with both hands.
Time to Go Out:
No moon this year, so they can be viewed any time after 10pm. There could be as many as 50-80 meteors per hour. The peak night will be Saturday.
Where to Go and Sky Conditions:
You want to be as far away from the City/Town as possible to reduce the amount of light pollution. Find a dark road out in the country somewhere far away from street lights.
Obviously it has to be a clear night that you can see the sky.
Finding the Meteors
You should be able to see lots of meteors looking to the northeast.
Do I Need A Tripod?
YES and the heavier the better!
ISO:
Start with 400 ISO and see how much detail you can pick up. If you aren't getting enough details, try 800 ISO.
Lens:
You want to use a wide(16-35mm) to normal lens(50mm) so you can get a wide range of sky area.
Shooting Mode: Has to be MANUAL as you need to set the shutter speed and aperture.
Shutter Speeds:
The longer the speed you use, the more meteors you will get. However, if you go too long, the stars will begin to form trails. To figure out how to long to shoot the stars without getting trails, divide 600 by the length of your lens, and that is how many seconds you should use. For example, if you are using a 17mm lens, 600/17mm= 35 seconds.
However, if you do long exposures like 30minutes to 1 hour(or longer), you will get star trails that look neat along with the straight lines of meteors. The photo above was done for three hours(although you can see the light pollution made the sky brownish instead of black!) Note you will need a cable release or remote, and use BULB mode to do this. No way you can hold the button down for 1-3 hours...
Aperture:
Use your widest aperture (smaller number, for example 3.5/4.5/5.6) to let in as much light as possible. If you find the meteors coming out a bit bright, you can stop down one setting. If you have a lens that has a really wide aperture(1.8/2.8) that is even better!
Focus:
You have to use MANUAL focus and focus on the stars or set the focus on the lens to Infinity.
Other Shooting Tips:
-If you want to include trees, mountains, the horizon, etc they will provide an interesting silhouette shape and scale.
-You could also try using a flash during the exposure to light up the trees!
-Have an old film camera kicking around? Haul her out, throw in some ISO 400 film, and take some long exposures!(You have to have to use a cable release)
So go out there, have some fun, and send me some great shots or post them in the online student galleries if you have a login!
Tuesday, May 1, 2012
Updated info On Grand Manan workshop!
Just an bit of an update on the Grand Manan Photography workshop scheduled for July 12-15th! Getting lots of interest, I’m pumped and can’t wait!!! Make sure you contact me asap if you are interested in attending as spots are filling up! Please share with anyone you think may be interested as well! New details on MACHIAS SEAL ISLAND TRIP, PRICING, FLEXIBILITY, and TRANSPORTATION below!
Friday, February 10, 2012
GRAND MANAN PHOTOGRAPHY WORKSHOP JULY 12-15 2012
Saturday, December 31, 2011
Year in Review....
It was weird picking up the camera again...hadn't caressed a Canon in a long time...
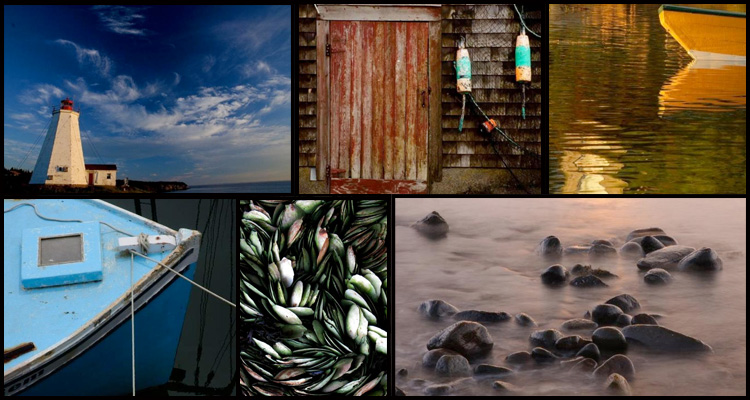
I thought I'd share some of my favourite photos from the past year.
Tuesday, November 1, 2011
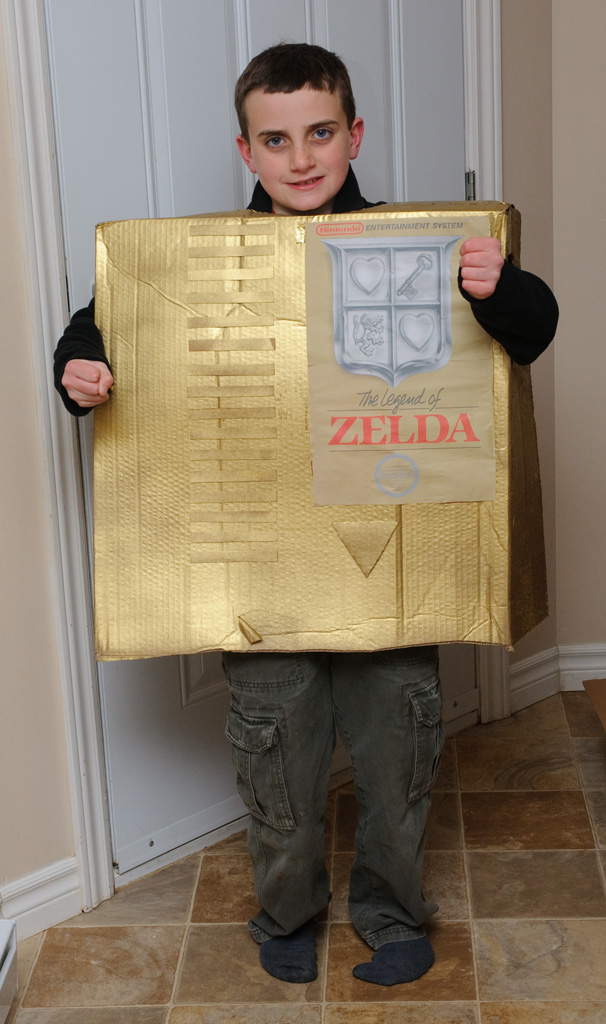
Zelda Halloween Costume
Well, I had fun with making this and some good comments, so I'd thought I'd post a bit about it.
My son Gabriel is a big fan of retro gaming...he loves anything old. So we have a Sega Master system, Super Nintendo, Game Boy Advance, and of course lots of games on the Wii from the Virtual Console(old games that you can download and play on the Wii.)
So, when coming up with an idea for a costume for Halloween, he wanted to do something Nintendo related. We just recently bought the Wii game Legend of Zelda, Twilight Princess, and he had downloaded some of the older Zelda games as well, so he though he'd like to go as Link (The hero of the game for those who aren't/were never gamers or don't have kids...)
It just so happened that the element in our oven had died, and the box was sitting next to the kitchen table...and the idea came. Why not go as a Nintendo cartridge?
Since I didn't have any Nintendo cartridges kicking around the house, I went to Google and found some photos of various cartridges. And of course I came across the Legend of Zelda gold version of the cartridge...which I had completely forgotten about. So we had our idea.

So then I had to make it look like a cartridge.
Also wanted to try to get it to scale, so I measured the photo of the real cartridge, then did math (i hate math) to scale it to the box size.
There was an indentation on the top of the cartridge where your thumb was supposed to go (how many of you got bruises from banging your thumb on the top of the open in the NES?), but I realized that creating that would mean Gabe probably wouldn't fit into the costume. Same thing goes with the indents that should be on the bottom.
For the ridges on the cartridges, I took a box of alphabets cereal, measured out the right dimensions and cut a bunch of rectangular strips.
Then, gold spray paint! Did almost three coats as for some reason, the writing on the box kept coming through the paint. Sprayed all the little ridge strips as well.
Originally I was going to try to draw the label, but decided that wouldn't look great..but I was able to get a higher resolution photo that had the label nice and big, so I just printed that off to scale. It's not the exact label, but it was the only one that was high enough resolution to print, so it's close enough.
Glued on the label, glued on the strips. Cut the holes for Gabe's head and arms (had to cut the head hole twice, he's got a huge noggin...)
Last step was to use one of the cut holes to make the triangle on the box. Glued it on, and we're done!
The costume didn't need any extra safety additions as the entire costume is reflective.
The only problem...the width of the box meant he couldn't hold his candy bag with both hands!
Oops...
The whole thing completely ties in with the fact that this year is the Legend of Zelda's 25th Anniversary, and the newest game they are releasing for the Wii (Legend of Zelda-Skyward Sword) comes with a gold colored Wii remote.
http://www.zelda.com/skywardsword/
Noel
My son Gabriel is a big fan of retro gaming...he loves anything old. So we have a Sega Master system, Super Nintendo, Game Boy Advance, and of course lots of games on the Wii from the Virtual Console(old games that you can download and play on the Wii.)
So, when coming up with an idea for a costume for Halloween, he wanted to do something Nintendo related. We just recently bought the Wii game Legend of Zelda, Twilight Princess, and he had downloaded some of the older Zelda games as well, so he though he'd like to go as Link (The hero of the game for those who aren't/were never gamers or don't have kids...)
It just so happened that the element in our oven had died, and the box was sitting next to the kitchen table...and the idea came. Why not go as a Nintendo cartridge?
Since I didn't have any Nintendo cartridges kicking around the house, I went to Google and found some photos of various cartridges. And of course I came across the Legend of Zelda gold version of the cartridge...which I had completely forgotten about. So we had our idea.
So then I had to make it look like a cartridge.
Also wanted to try to get it to scale, so I measured the photo of the real cartridge, then did math (i hate math) to scale it to the box size.
There was an indentation on the top of the cartridge where your thumb was supposed to go (how many of you got bruises from banging your thumb on the top of the open in the NES?), but I realized that creating that would mean Gabe probably wouldn't fit into the costume. Same thing goes with the indents that should be on the bottom.
For the ridges on the cartridges, I took a box of alphabets cereal, measured out the right dimensions and cut a bunch of rectangular strips.
Then, gold spray paint! Did almost three coats as for some reason, the writing on the box kept coming through the paint. Sprayed all the little ridge strips as well.
Originally I was going to try to draw the label, but decided that wouldn't look great..but I was able to get a higher resolution photo that had the label nice and big, so I just printed that off to scale. It's not the exact label, but it was the only one that was high enough resolution to print, so it's close enough.
Glued on the label, glued on the strips. Cut the holes for Gabe's head and arms (had to cut the head hole twice, he's got a huge noggin...)
Last step was to use one of the cut holes to make the triangle on the box. Glued it on, and we're done!
The costume didn't need any extra safety additions as the entire costume is reflective.
The only problem...the width of the box meant he couldn't hold his candy bag with both hands!
Oops...
The whole thing completely ties in with the fact that this year is the Legend of Zelda's 25th Anniversary, and the newest game they are releasing for the Wii (Legend of Zelda-Skyward Sword) comes with a gold colored Wii remote.
http://www.zelda.com/skywardsword/
Noel
Subscribe to:
Posts (Atom)