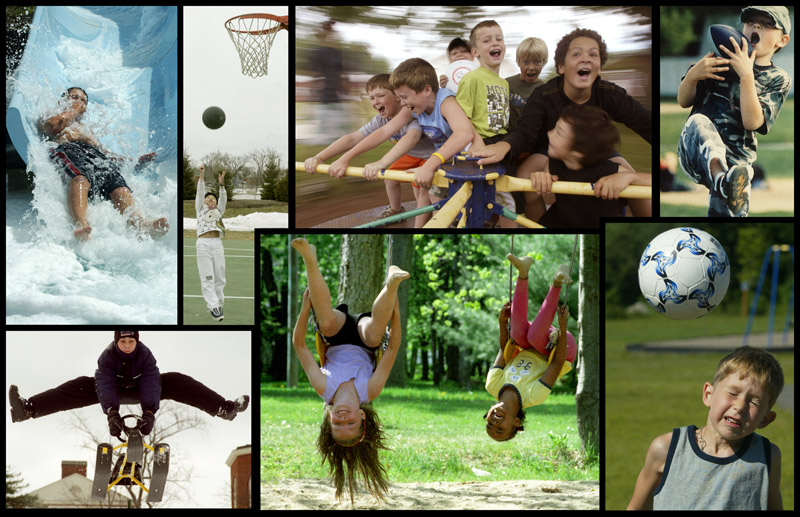
Since Halloween is upon us, I thought I'd give out some tips on how to get some great pumpkin, costume, and other pix!
PUMPKING PIX
Great pumpkin shots are easy to do! Light em up with a candle and fire away, right? Sure, but you will have to do the proper metering to get the best shots. If you go with just what the meter wants, chances are you will get a pumpkin that is too dark on the exterior and too bright inside(photo on left). Instead, you could meter from the exterior skin of the pumpkin(get in close and fill the frame with only the pumpkin skin, or use your spot meter) or set your +/- in the PLUS, to get the middle photo. If you want just the light from the pumpkin, then you take your meter reading more from the light inside the pumpkin(get in close and fill the frame with only the light in the pumpkin, or use your spot meter) if using Manual(M) mode, or if you are using Shutter(TV/S) or Aperture Priority(A/AV) mode you will most likely have to set your exposure compensation(+/-) to the MINUS, probably -1 or -2. Remember to see it back to zero when you are done!
You may want to turn the lights down in the room to get more darkness. Also, a candle will give a warmer light than LED's. To really warm up candle light, set the white balance to DAYLIGHT, or use TUNGSTEN if it's too warm. If you find your LED light is too cool, try using SHADE or OVERCAST white balance to warm it up.
You will also need to use a tripod as the light will be very low and your shutter speeds will be slow. So you could also try zooming and panning to get some neat effects!
COSTUME SHOTS
To get some great costume shots, I would suggest finding a nice plain wall you can stand the subject against. Then, use a flash bounced off the ceiling to get a softer light that won't cast dark shadows against the wall.
You are wondering, Noel, how did you get that old kind of look on those pics? Well, they were taken using an old twin lens film camera, and I basically shot blindly with the flash with what I thought would be a good exposure and ended up underexposing every shot. So the old look is basically underexposed film printed lighter then scanned and worked a bit in photoshop. No, that wasn't what I wanted to do. But when life gives you lemons, make lemonade....they look fine in black and white of course...
Obviously if you are going to get shots of the kiddies out in their costumes, you will have to use flash as it will be very dark. Use MANUAL shooting mode(M), set the shutter speed to 60th/second and pick an aperture of F8, pop up the flash and use the flash exposure compensation if it's too bright or too dark. If you want to try to get some more ambient light, turn the shutter speed lower(1/15th or 1/8th) to get more light and some funky blur.
MONSTER LIGHTING!
If you want some spooky shots, use MONSTER LIGHTING! You want to have a light source that comes from below, either a high powered lamp, flashlight, or your flash. Place it right underneath the subject's face so you get lots of creepy shadows, as get them to make a scary face. If you are using a lamp or flashlight, make sure that you take your meter reading more from the brighter areas(zoom in on them or use your spot meter) if using Manual(M) mode, or if you are using Shutter(TV/S) or Aperture Priority(A/AV) mode you will most likely have to set your exposure compensation(+/-) to the MINUS, probably -1 or -2. Remember to see it back to zero when you are done!
If you are using your flash, you will need to use an off camera flash cord or trigger it wireless and hold it under the person's face. Try a manual setting of 60th/second at F16 or F22, and adjust the flash power as necessary!
Good luck, and Happy Halloween! Post some pix on the gallery if you get some good ones!
Hi, I'm award winning photographer and educator Noel Chenier Check out my new learning community at http://www.learnphoto365.com! This is an old blog archive of posts. Try out my Photography Assignment Generator Apps on the App Store! www.learnphoto.ca/apps. Any questions, contact me at noel@noelchenier.ca
Wednesday, October 29, 2008
Tuesday, October 28, 2008
PIXELS TO PRINT: THE ART OF PHOTOJOURNALISM the BOOK! Only $20
Need to finalize how many people are interested in getting copies of Pixels to Print: The Art of Photojournalism. Due to the number of copies already requested, the price will now be only $20, which will include shipping and taxes. If you would like copies, please let me know how many by MONDAY November 3rd. It will take about two weeks for them to arrive. It would be a nice Christmas gift for anyone who likes photography!
If you are interested, please reply to me at nchenier(at)nbnet.nb.ca, and forward this info on to anyone else you think may be interested!
About the book:
As many of you know, myself and my photo colleagues at the Telegraph Journal recently had an exhibit of our work, Pixels to Print: The Art of Photojournalism in Saint John and Fredericton. The book is a catalogue of every image in the show. The book is 7" high by 9" wide, full colour printing.
You can view a preview of the book here:
http://www.lulu.com/browse/preview.php?fCID=2742421
***NOTE-DO NOT CLICK ON ADD CART! If you order through the website, you will have to pay for full shipping and taxes as well!****
Exact specs:
9" x 7", perfect binding, white interior paper (80# weight), full-color interior ink, white exterior paper (100# weight), full-color exterior ink
Thanks
Noel
Tuesday, October 21, 2008
Upcoming Photography Courses and Workshops With Noel in Saint John and Fredericton
For the latest course info, head to my new site www.learnphoto365.com!
Monday, October 20, 2008
Meteor Showers this Week! Here's How to Shoot Em!
The annual Orionid Meteor Showers is happening this week from Oct 20-24th, so get out your tripods and go shoot them! Here's some tips on how!
Pre-Shooting Preparation:
Charge your batteries fully before going out. It will be cold and that can affect battery life.
Wear some warm clothes, a hat, and gloves. Bring some hot beverages, some friends, and make it a fun outing! At least you'll have someone to talk to between exposures.
Also bring a flashlight or LED keychain light so you can see what you are doing when changing your settings. A headlight looks dorky, but it let's you works with both hands.
Time to Go Out:
Here's the problem. They are best viewed after midnight, with 3-4am being the prime time. There could be as many as 40-60 meteors per hour. The peak night will be October 21st. Also, the later you go, the less moon will be in the sky which will make the meteors stand out a bit more.
Where to Go and Sky Conditions:
You want to be as far away from the City/Town as possible to reduce the amount of light pollution. Find a dark road out in the country somewhere far away from street lights.
Obviously it has to be a clear night that you can see the sky. Long range forecast look good for Tuesday, not so good Wednesday, and good for Thursday, Friday.
Finding Orion:
Orion is one of the easiest constellations to find(it's the three stars close together that form the belt of Orion). At the time you are going out, it should be in the South East/Eastern part of the sky.
Do I Need A Tripod?
Yes, and the heavier the better!
ISO:
Start with 400 ISO and see how much detail you can pick up. If you aren't getting enough details, try 800 ISO.
Lens:
You want to use a wide(16-35mm) to normal lens(50mm) so you can get a wide range of sky area.
Shooting Mode:
Has to be MANUAL as you need to set the shutter speed and aperture.
Shutter Speeds:
The longer the speed you use, the more meteors you will get. However, if you go too long, the stars will begin to form trails. To figure out how to long to shoot the stars without getting trails, divide 600 by the length of your lens, and that is how many seconds you should use. For example, if you are using a 17mm lens, 600/17mm= 35 seconds.
However, if you do long exposures like 30minutes to 1 hour(or longer), you will get star trails that look neat along with the straight lines of meteors. The photo above was done for three hours(although you can see the light pollution made the sky brownish instead of black!) Note you will need a cable release or remote, and use BULB mode to do this. No way you can hold the button down for 1-3 hours...
Aperture:
Use your widest aperture (smaller number, for example 3.5/4.5/5.6) to let in as much light as possible. If you find the meteors coming out a bit bright, you can stop down one setting. If you have a lens that has a really wide aperture(1.8/2.8) that is even better!
Focus:
You have to use MANUAL focus and focus on the stars or set the focus on the lens to Infinity.
Other Shooting Tips:
-If you want to include trees, mountains, the horizon, etc they will provide an interesting silhouette shape and scale.
-You could also try using a flash during the exposure to light up the trees!
-Have an old film camera kicking around? Haul her out, throw in some ISO 400 film, and take some long exposures!(You have to have a cable release)
So go out there, have some fun, try not to freeze to death, and send me some great shots or post them in the online student galleries if you have a login!
Wednesday, October 15, 2008
So Mr Silhouette...How Do You Do One?
My thanks to colleague Kevin Barrett, who pointed out that I forgot to mention in my posting on how much I loved silhouettes how to actual make a silhouette...Some teacher I am!
Well, silhouettes are very easy.
First, you need to have a subject that is backlit. A subject in front of a window with bright light behind it or a subject in the shade with full sun on the background behind them. Then, you need to expose for the background.
If you are using MANUAL metering mode(M), fill the camera frame with the BACKGROUND(don't get any of the person or subject you want to silhouette!) and get a proper exposure. Then when you recompose the scene to take the photograph, ignore the fact that the meter is now in the MINUS(-). You want that. Take your shot.
If you are using Shutter Priority(TV or S), Aperture Priority(AV or A), or Program mode(P), then use your EXPOSURE COMPENSATION(+/-) and set it to MINUS 1(-1.0) if the subject is small in the frame, or MINUS 2(-2.0) if it is larger in the frame. This will tell the camera to take it's average meter reading and darken it down a bit to get the silhouette.
Have fun!
Noel
Thursday, October 9, 2008
I'm a Sucker for Silhouettes......
Anyone who knows me won't be surprised by the title of this blog entry! I can shoot anywhere from ten to thirty silhouettes a year, easy.
The one above is one of my favourite photographs I've taken. It is of a member of the 2nd Royal Canadian Regiment in downtown Fredericton while taking part in training in the urban environment for upcoming peacekeeping duty in war-town Bosnia-Herzegovina. I had been with them all afternoon documenting their various scenarios, and was walking down Queen Street to go back to the office. I looked across the street and saw the warm late afternoon fall light on the Justice building, and a line of soldiers silhouetted as they walked past. I ran down the street, hunkered down between two cars, and got two frames(this was back in the film days) of the last soldier framed by the archway of the entrance with the word Justice above.
One of the reasons I like silhouettes is that the lack of detail on the subject really makes the viewer focus on the other parts of the image.
So while the child is important in this picture below, you really see the multiple hand prints created on the frosted glass of the Beaverbrook Arena in Saint John. I could have used a flash to fill in the light so you could see the child, but that would have taken away from the handprints.
Sometimes the advantage to the silhouette is so the people are not identifiable. For the shot below, I couldn't get permission from the parents of these kids, but making them silhouetted you can't tell who they are, so I was able to get my shot.
People hate having their picture taking smoking, drinking and playing VLT's, so I use silhouettes so they aren't identifiable and don't need to give me their names. The silhouette provides an interesting shape, but the colour of the flame is what draws you in. Of course the paper ran this in black and white... :(
For the kids below, I didn't have to silhouette them, I could have exposed for them and gotten detail. But then the sunlight reflecting off the river would have been way overexposed. So instead I exposed for the reflection and went for the silhouette.
The dragon boat shot below is another example. The boats were backlit, so even if I had exposed for the people(which I did for a few shots to please my editors of course...) they would have been surrounded by bright areas and probably would have flaring around their heads.
Sometimes I go to events that are frankly.....visually boring. News conferences and speeches are the types that usually fit this category. The photo below was taken at a meeting of ambassadors in St Andrews. The speakers stood up at a podium that was far to the left of the head table, and the background was nothing but a hotel room wall...ugh.
A certain gentleman was speaking, and I noticed the interesting light behind his head that really showed his profile.
The shot below is from a training exercise for the reservists in Saint John. The scenario was they were attacking a position of insurgents. We were allowed to be with the insurgents to document the attack. Great right? Except for the fact this was at 7am in the morning, and the sun was rising right in front of us. That meant no light on the soldiers, and flaring from the sun. Then the soldiers rolled in some smoke grenades, creating a huge cloud of red smoke, and I had my front page picture!
For the fire shot, I loved the smoke and the red flame at the bottom, so I didn't use the flash to light the firefighter to keep the mood.
And sometimes you've got great lines, shapes, and patterns, and the silhouette is the way to show it off!
Well, silhouettes are very easy.
First, you need to have a subject that is backlit. A subject in front of a window with bright light behind it or a subject in the shade with full sun on the background behind them. Then, you need to expose for the background.
If you are using MANUAL metering mode(M), fill the camera frame with the BACKGROUND(don't get any of the person or subject you want to silhouette!) and get a proper exposure. Then when you recompose the scene to take the photograph, ignore the fact that the meter is now in the MINUS(-). You want that. Take your shot.
If you are using Shutter Priority(TV or S), Aperture Priority(AV or A), or Program mode(P), then use your EXPOSURE COMPENSATION(+/-) and set it to MINUS 1(-1.0) if the subject is small in the frame, or MINUS 2(-2.0) if it is larger in the frame. This will tell the camera to take it's average meter reading and darken it down a bit to get the silhouette.
Happy Shooting!
Noel Chenier
----------
Photographer and teacher
Connect with Noel on INSTAGRAM or TWITTER or via EMAIL
LEARNPHOTO.CA Noel’s online photography learning community! http://www.learnphoto.ca
Photography Assignment Generator Apps now available on the app store!
Noel’s Portfolio
Work Done by My Students!
I hope you find these tips useful!
If so, it would be awesome if you would check out my Photography Assignment Generator Apps on the app store, a unique photography app that's meant to inspire you to take great photos!
Perfect for anyone taking part in a Photo 365 challenge, there are over a hundred individual assignments and hundreds of thousands of potential random ones. Versions available for iPhone/iPod and iPad, including free versions so you can try them out! Full details, including reviews and tour videos of the apps can be found at www.learnphoto.ca/apps Even if you only download the free version that would help get it up the app store lists!
The one above is one of my favourite photographs I've taken. It is of a member of the 2nd Royal Canadian Regiment in downtown Fredericton while taking part in training in the urban environment for upcoming peacekeeping duty in war-town Bosnia-Herzegovina. I had been with them all afternoon documenting their various scenarios, and was walking down Queen Street to go back to the office. I looked across the street and saw the warm late afternoon fall light on the Justice building, and a line of soldiers silhouetted as they walked past. I ran down the street, hunkered down between two cars, and got two frames(this was back in the film days) of the last soldier framed by the archway of the entrance with the word Justice above.
One of the reasons I like silhouettes is that the lack of detail on the subject really makes the viewer focus on the other parts of the image.
So while the child is important in this picture below, you really see the multiple hand prints created on the frosted glass of the Beaverbrook Arena in Saint John. I could have used a flash to fill in the light so you could see the child, but that would have taken away from the handprints.
Sometimes the advantage to the silhouette is so the people are not identifiable. For the shot below, I couldn't get permission from the parents of these kids, but making them silhouetted you can't tell who they are, so I was able to get my shot.
People hate having their picture taking smoking, drinking and playing VLT's, so I use silhouettes so they aren't identifiable and don't need to give me their names. The silhouette provides an interesting shape, but the colour of the flame is what draws you in. Of course the paper ran this in black and white... :(
For the kids below, I didn't have to silhouette them, I could have exposed for them and gotten detail. But then the sunlight reflecting off the river would have been way overexposed. So instead I exposed for the reflection and went for the silhouette.
The dragon boat shot below is another example. The boats were backlit, so even if I had exposed for the people(which I did for a few shots to please my editors of course...) they would have been surrounded by bright areas and probably would have flaring around their heads.
Sometimes I go to events that are frankly.....visually boring. News conferences and speeches are the types that usually fit this category. The photo below was taken at a meeting of ambassadors in St Andrews. The speakers stood up at a podium that was far to the left of the head table, and the background was nothing but a hotel room wall...ugh.
A certain gentleman was speaking, and I noticed the interesting light behind his head that really showed his profile.
The shot below is from a training exercise for the reservists in Saint John. The scenario was they were attacking a position of insurgents. We were allowed to be with the insurgents to document the attack. Great right? Except for the fact this was at 7am in the morning, and the sun was rising right in front of us. That meant no light on the soldiers, and flaring from the sun. Then the soldiers rolled in some smoke grenades, creating a huge cloud of red smoke, and I had my front page picture!
For the fire shot, I loved the smoke and the red flame at the bottom, so I didn't use the flash to light the firefighter to keep the mood.
And sometimes you've got great lines, shapes, and patterns, and the silhouette is the way to show it off!
So Mr Silhouette...How Do You Do One?
First, you need to have a subject that is backlit. A subject in front of a window with bright light behind it or a subject in the shade with full sun on the background behind them. Then, you need to expose for the background.
If you are using MANUAL metering mode(M), fill the camera frame with the BACKGROUND(don't get any of the person or subject you want to silhouette!) and get a proper exposure. Then when you recompose the scene to take the photograph, ignore the fact that the meter is now in the MINUS(-). You want that. Take your shot.
If you are using Shutter Priority(TV or S), Aperture Priority(AV or A), or Program mode(P), then use your EXPOSURE COMPENSATION(+/-) and set it to MINUS 1(-1.0) if the subject is small in the frame, or MINUS 2(-2.0) if it is larger in the frame. This will tell the camera to take it's average meter reading and darken it down a bit to get the silhouette.
Happy Shooting!
Noel Chenier
----------
Photographer and teacher
Connect with Noel on INSTAGRAM or TWITTER or via EMAIL
LEARNPHOTO.CA Noel’s online photography learning community! http://www.learnphoto.ca
Photography Assignment Generator Apps now available on the app store!
Noel’s Portfolio
Work Done by My Students!
I hope you find these tips useful!
If so, it would be awesome if you would check out my Photography Assignment Generator Apps on the app store, a unique photography app that's meant to inspire you to take great photos!
Perfect for anyone taking part in a Photo 365 challenge, there are over a hundred individual assignments and hundreds of thousands of potential random ones. Versions available for iPhone/iPod and iPad, including free versions so you can try them out! Full details, including reviews and tour videos of the apps can be found at www.learnphoto.ca/apps Even if you only download the free version that would help get it up the app store lists!
Subscribe to:
Posts (Atom)